To connect to a network printer, please follow these steps: (For staff using office PC only)
There are few methods to connect to a Network Printer in Windows.
Method 1:
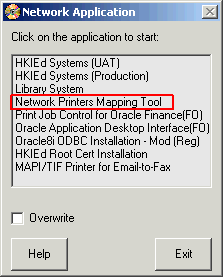
- Double click the icon "Network Application
 " from the desktop or the quick launch bar.
- Choose "Network Printers Mapping Tool"
- Then highlight the printer that you want to add and click the "Add Printer as Default" or "Add Printer" button.
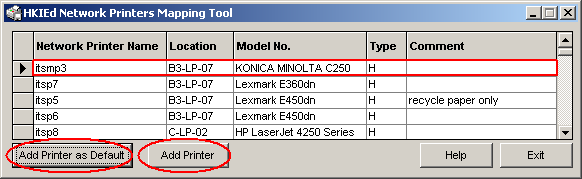
- The selected printer will be added to your system when installation is completed.
Note: If you wish, you may change the default printer to another one (e.g. the local printer) in 'Control Panel -> Printers and Faxes'.
Method 2:
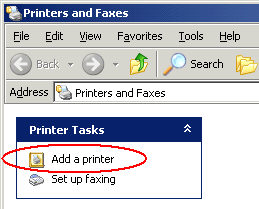
- Click "Start" -> "Setting" -> "Printers and Faxes".
- Click "Add a printer" from the left panel.
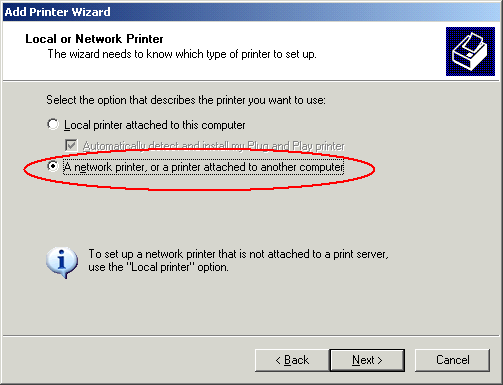
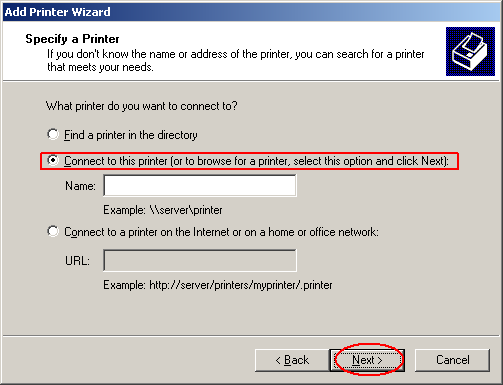
- Click "Next" -> select "A network printer, or a printer attached to another computer" -> "Next"
- Choose "Connect to this printer (or to browse for a printer, select this option and click next)". If you know the shared printer name, you can enter the name in the box. Otherwise, click "Next" to browse for the printer. This may takes some times for the system to search for the printers on the network.
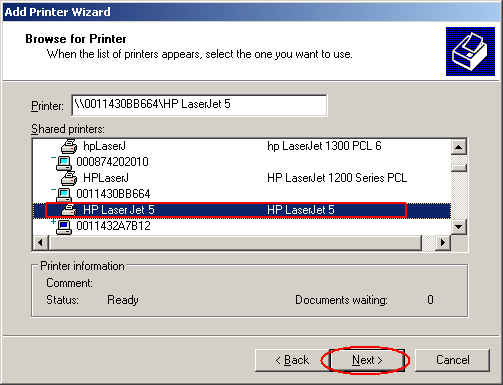
- Select your target print queue, e.g., "HP LaserJet 5" and click "Next.
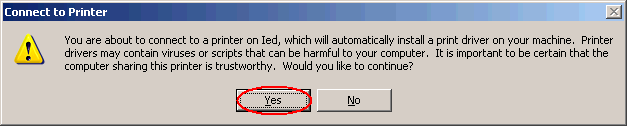
- Then click "Yes" when Windows prompts it will try to load the printer driver automatically.
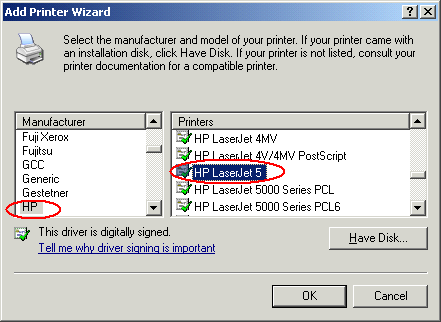
- If Windows cannot locate any driver automatically, it will prompt to search to printer driver. Then click "OK".

- Select the printer driver according to the printer model, e.g. HP LaserJet 5.
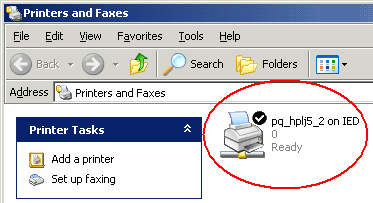
- Click "Finish". Then you will notice that a printer icon appears.
You can now send your print jobs to your departmental queue inside your application.
Author

kwcheng