
To protect sensitive and personal information, you may encrypt the file with data encryption software. VeraCrypt is one such software supporting 256-bit AES encryption which is a strong encryption tool adopted by the US government and it works on Windows, Mac and Linux platform. VeraCrypt is a free open-source software and that is based on TrueCrypt 7.1a. Therefore, you can use VeraCrypt to open TrueCrypt container. It is available in our network (via Network Teaching Software).
Warning: It is important to note that once information is encrypted by any encryption software, it can only be opened with the CORRECT password. Losing the password means losing the information for good.
The followings are procedures in using VeraCrypt to protect sensitive data on an office PC or on a USB thumb drive:
VeraCrypt is available on "Network Teaching Software" for office PC. For personal use, Veracrypt can be downloaded from "https://www.veracrypt.fr", where you can also find more details about the encryption software.
Create VeraCrypt volume container file (Screen captured base on VeraCrypt 1.25.9)
- Make sure you have login to the network
- Start "Network Teaching Software"

- Click 'VeraCrypt Encryption Software'
- Create a VeraCrypt volume (which is in the form of a file that you have to give a name, a password and specify the file size).
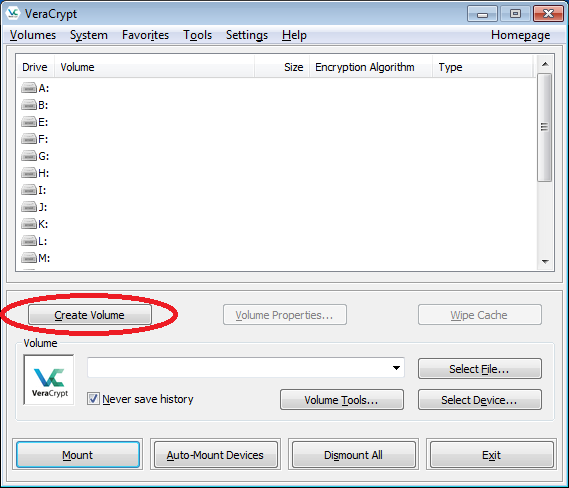
- From the main VeraCrypt window, click "Create Volume".
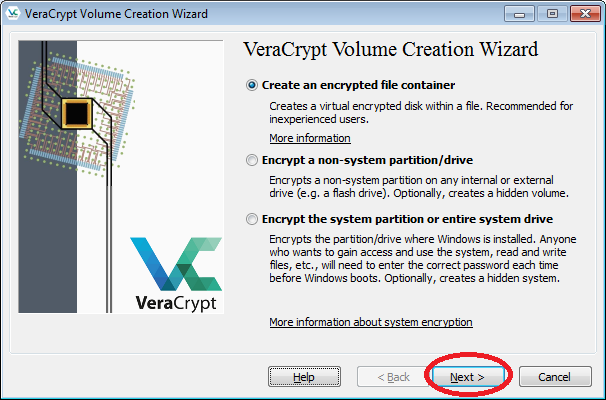
- Then choose "Create an encrypted file container", and click "Next".
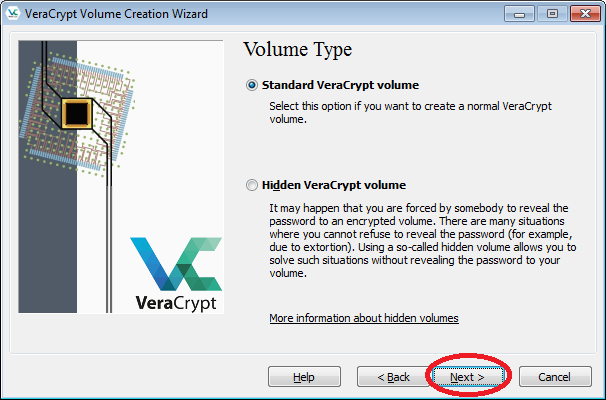
- Then choose "Standard VeraCrypt volume", and click "Next".
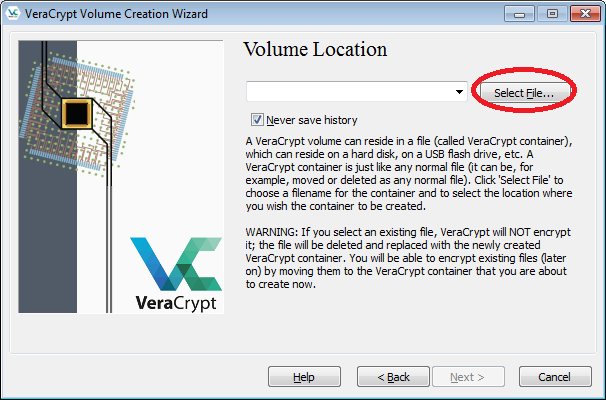
- Click the "Select File" button.
- Select the desired path (e.g. D:\My Documents) in the file selector. Enter a name for the file in the File name box (e.g. "My Volume"). Then click "Save".
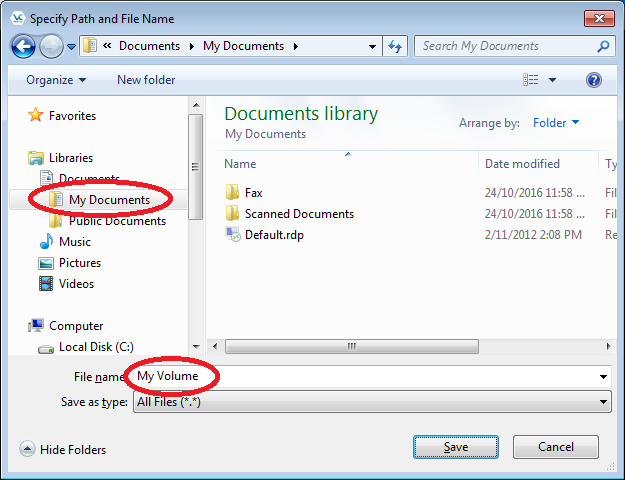
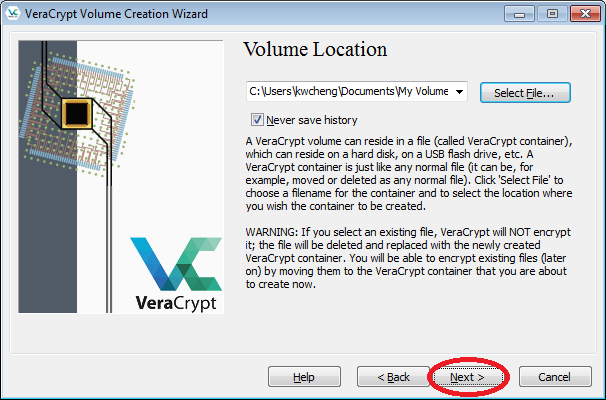
- In the Volume Creation Wizard window, click "Next".
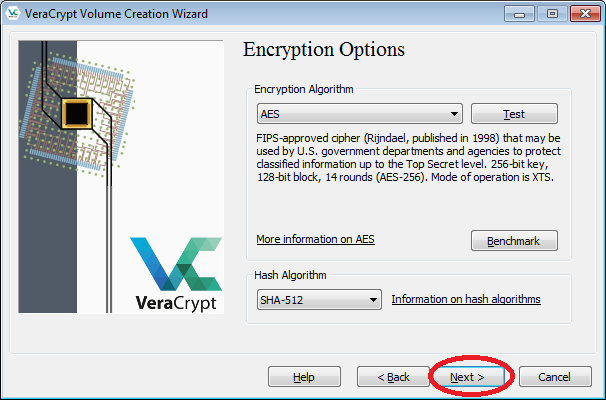
- Here you can choose an encryption algorithm and a hash algorithm for the volume. If you are not sure what to select here, you can use the default settings and click "Next".
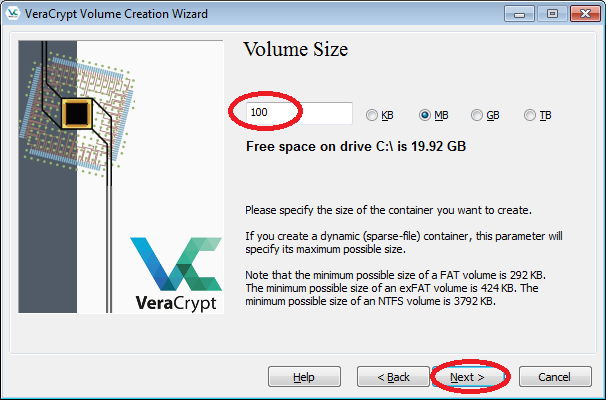
- Enter the desired size (e.g. 100MB) in the input field, click "Next".
(You cannot change the size once the volume was created.)
- Enter the desired password twice in the spaces provided (You are recommended to choose a good password. See the details shown on the screen). Then click "Next".
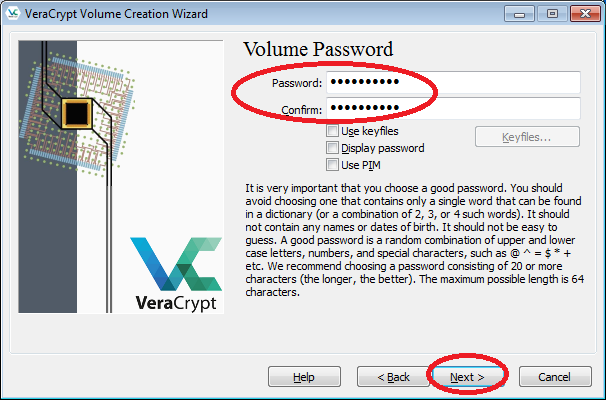
- Click "Format".
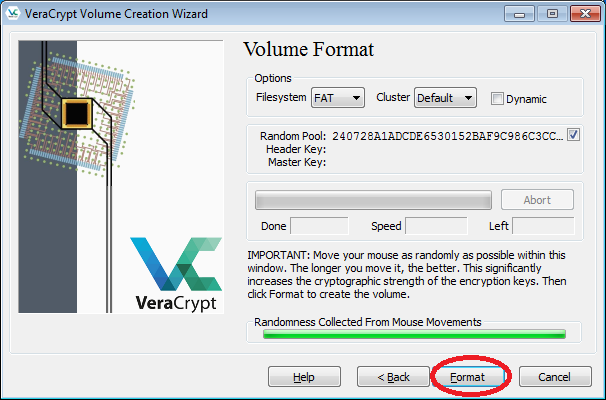
- When format is finished, click "OK" and then "Exit".
- From the main VeraCrypt window, click "Create Volume".
- Mount the volume. Once mounted, you will have a new drive.
- From the main window, select a drive letter from the list (e.g. "M"). This will be the drive letter to which the VeraCrypt container will be mounted. Then click "Select File".
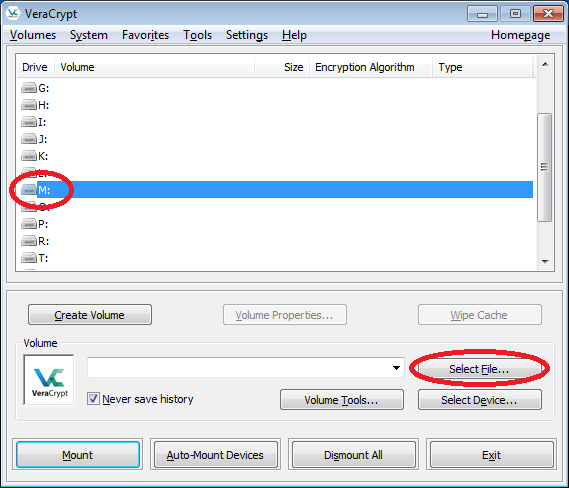
- Then select the container file you just created (i.e. "My Volume" from D:\My Documents). Then click "Open".
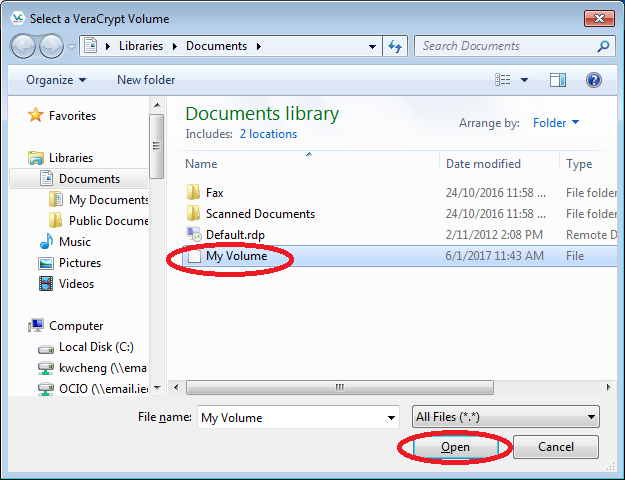
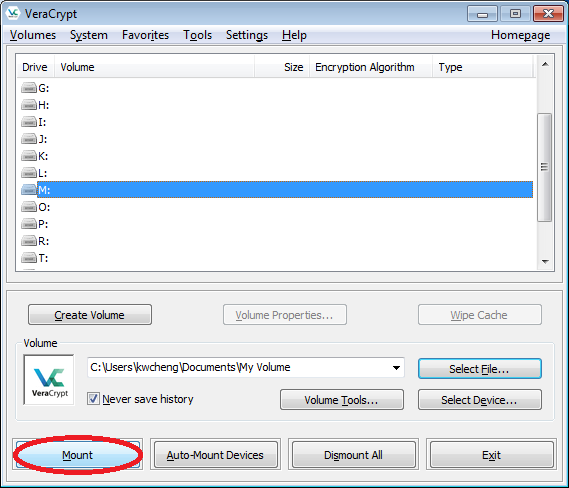
- Then click the "Mount" button.
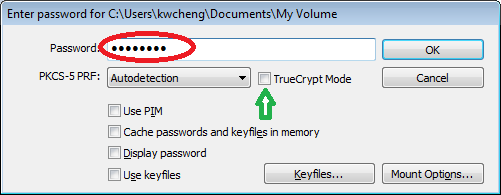
- Enter your password when it prompts, then click "OK". Note: If you are going to mount a "TrueCrypt" format volume file, you must tick the option "TrueCrypt Mode".
- From the main window, select a drive letter from the list (e.g. "M"). This will be the drive letter to which the VeraCrypt container will be mounted. Then click "Select File".
- When the VeraCrypt volume is mounted, you can copy or move sensitive files to the new drive (i.e. "M" in this example) and the files stored in the drive will be encrypted instantly.
- If you want to disconnect the volume and make the sensitive files inaccessible, either dismount the volume by clicking the "Dismount" button from the main window or restart the PC (this will make the drive disappear).
Note: Do NOT delete the VeraCrypt volume (i.e. the file "My Volume" in this example). Otherwise, all the files stored in the volume will also be deleted.
Protecting sensitive data on a USB thumb drive using "VeraCrypt"
VeraCrypt can be run in so-called ‘traveler’ mode, which allows you to access a VeraCrypt volume stored in a USB drive while using a PC in which VeraCrypt is NOT installed.
To prepare a USB drive for running VeraCrypt in 'traveler' mode, do the followings:
- Plug you USB thumb drive into a PC with VeraCrypt installed.
- Run VeraCrypt. From the VeraCrypt menu, click "Tools" -> "Traveler Disk Setup"
- Select the USB thumb drive by clicking the "Browse..." button.
- Tick the option "Include VeraCrypt Volume Creation Wizard". Then click "Create"
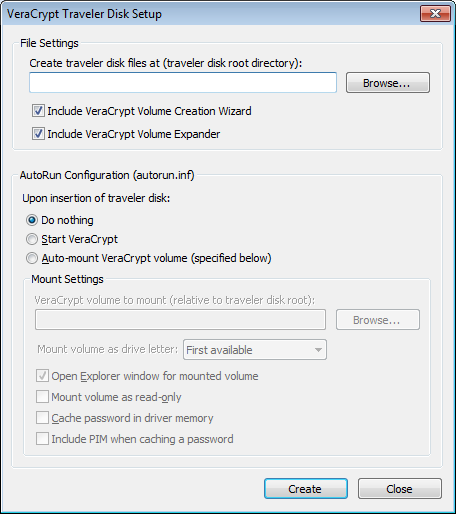
- You will get a confirmation window when the VeraCrypt traveler disk is created successfully. Click "OK" on the confirmation window and then click "Close" on the Disk Setup window.
- You can create a new VeraCrypt volume in the USB drive (please refer to the steps described in the previous section) for storing sensitive data. Otherwise, you can copy or move an existing VeraCrypt volume to the USB drive.
To access the VeraCrypt volume in the USB thumb drive using another PC:
- Plug you USB thumb drive into the PC.
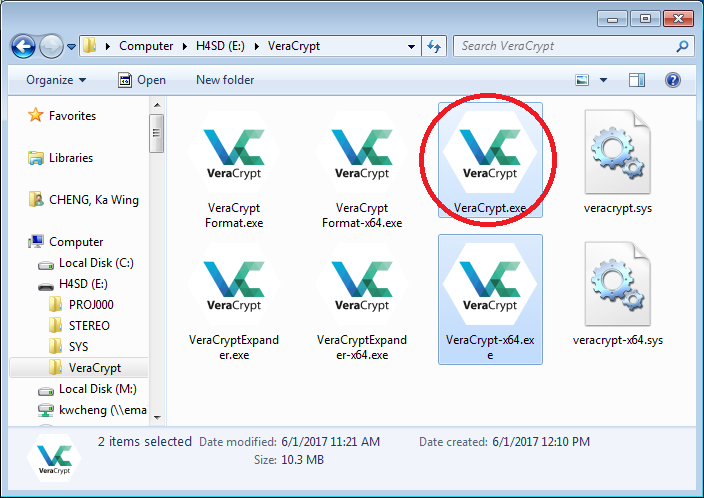
- Double click the icon "VeraCrypt.exe" from E:\VeraCrypt\ (replace E: with the drive letter of your USB thumb drive) to run VeraCrypt.
- Mount the volume from the USB thumb drive (please refer to the steps in the previous section).
