A rule is an action that Microsoft Outlook performs automatically upon incoming or outgoing messages, based on conditions that you specified. You can create a rule from a template, from a message, or using your own conditions.
Using Outlook Web App
- Login Outlook Web App.
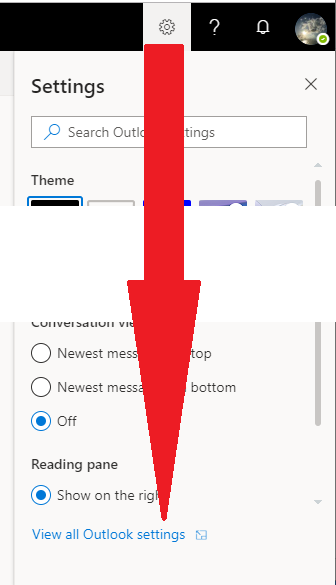
- Click the Gear icon
 , then click View All Outlook Settings
- From the Settings Window, choose Mail -> Rules
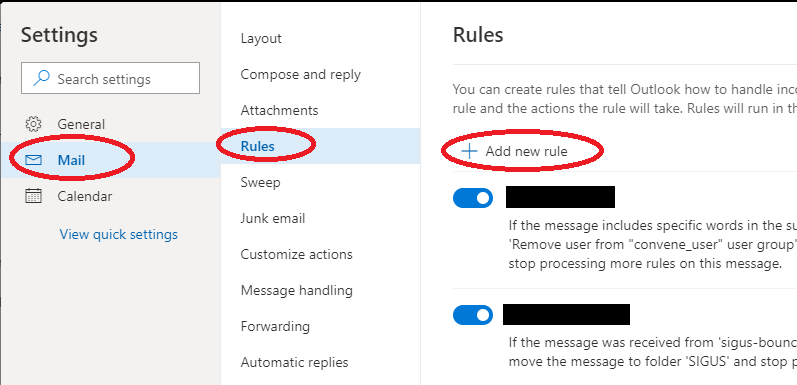
- Click + Add new rule icon
- On step 1, enter the name of this rule. (e.g. Move to Notices)
- On step 2, From the Add a condition field, choose "Subject includes"
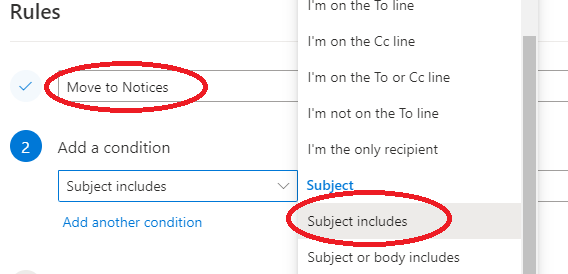
- For instance, if you want to filter all emails sent from departmental notice accounts, enter notice@eduhk.hk and click the "+" button to add.

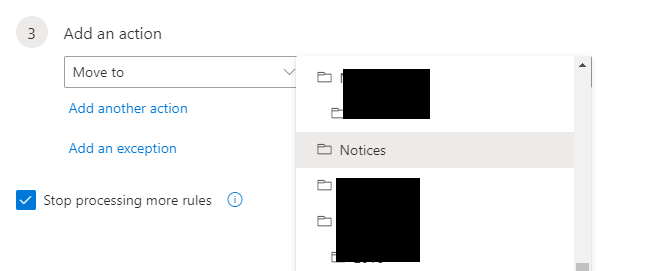
- On Step 3, from the Add a action field, choose "Move to"
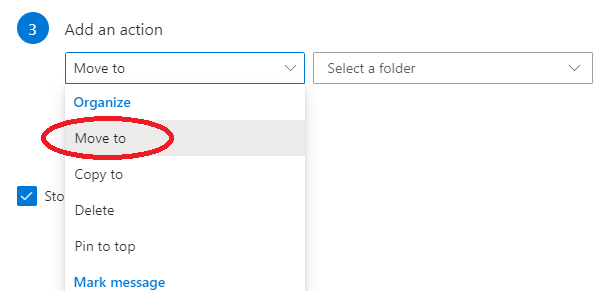
- Then select the folder you want to store the email messages and click "Save". (You may need to create a new folder if needed.)
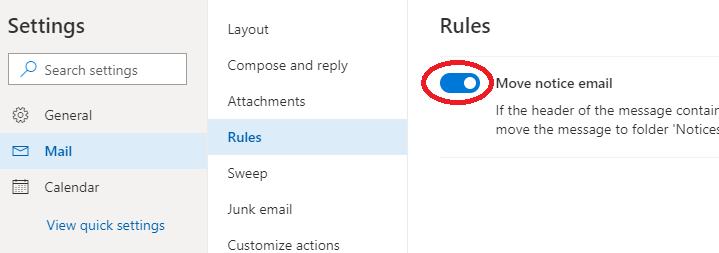
- Make sure the rule is turned on (button shown in blue colour). The rule is effective now. (If you want to turn off the rule, just un-tick it.)
Using desktop Outlook (Outlook 2010/2013)
- Open Outlook.
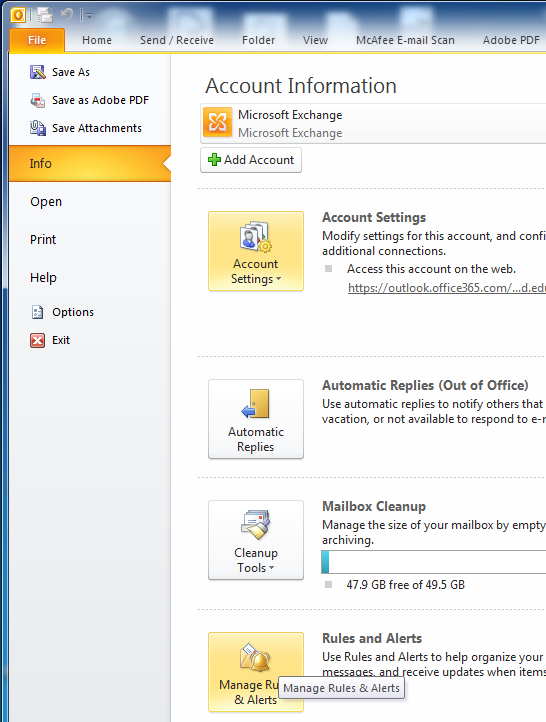
- Click File -> Info -> Rules & Alerts ->.
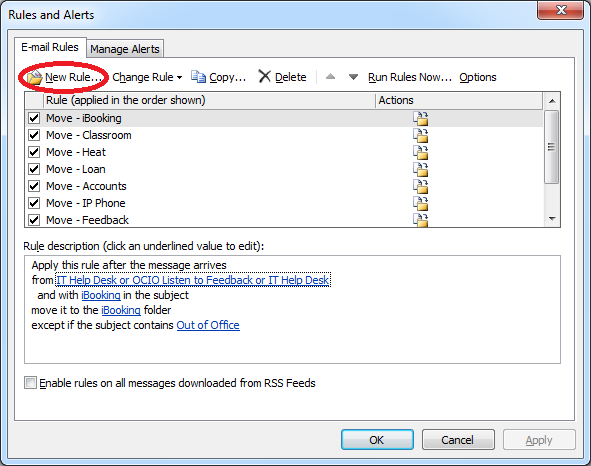
- Click the New rule...
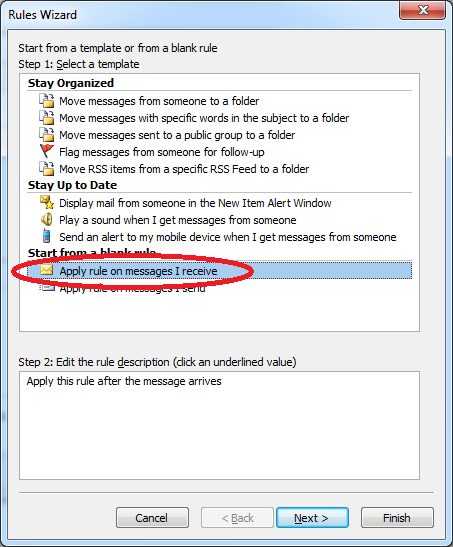
- Select Apply rule on messages I receive then press Next >.
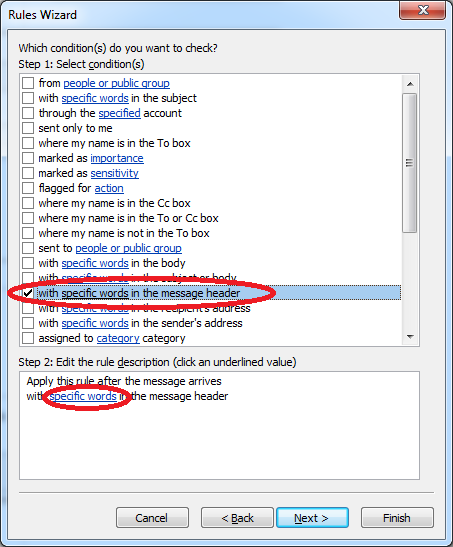
- Tick the option "with specific words in the message header" in step 1, then click on "specific words" in step 2.
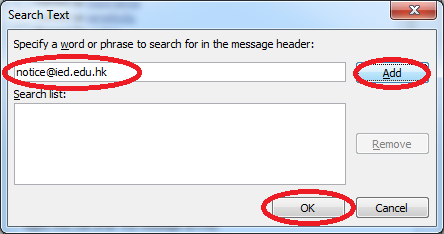
- For instance, if you want to filter all emails sent from departmental notice accounts, enter notice@eduhk.hk and click Add button to add in the list. Then Click "Ok" to complete the selection.
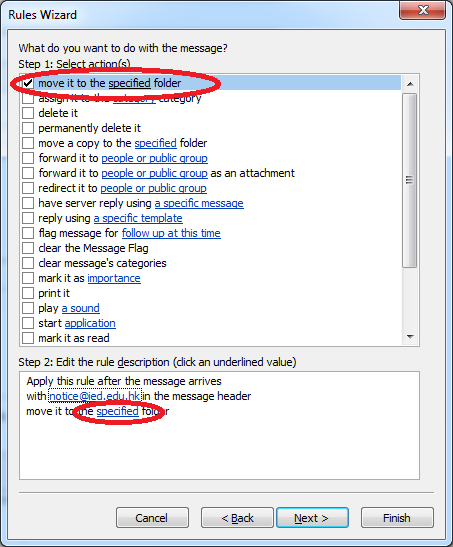
- Tick the option "move it to the specified folder" in step 1, then click on "specified" in step 2.
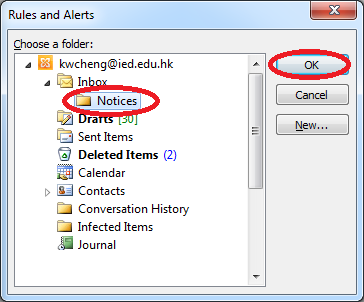
- Then select the folder you want to store the email messages and click "Ok". (You may create a new folder as needed.)
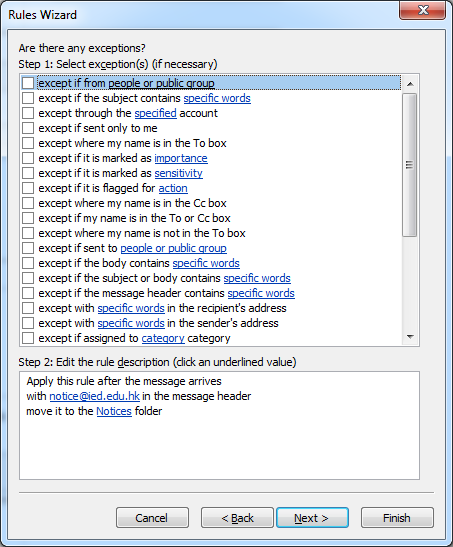
- For the exceptions, just click Next > to skip.
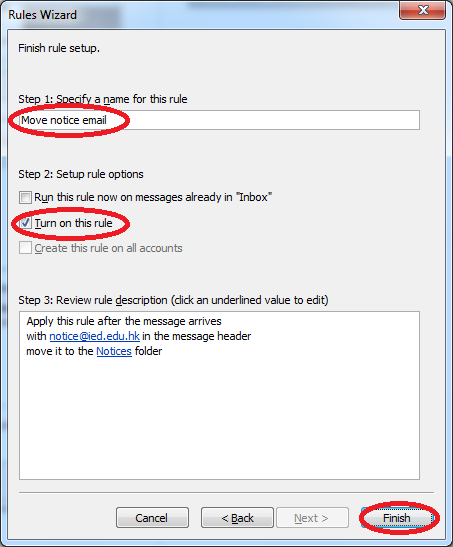
- Then enter a name for this rule. Make sure there is a tick for the Turn on this rule. Then click Finish.
- The rule is effective now. (If you want to turn off the rule, just un-tick the rule.)

